
BGMI Scope Guide: Which Scope to Use at Every Distance (With ADS Tips and Peek Techniques)
You picked up a 6x scope. You put it on your M416. You saw an enemy 30 meters away. You scoped in, and by the time your ADS opened, the enemy already knocked you.
That fight was lost before you fired a single bullet. Not because of your aim or your sensitivity. Because you used the wrong scope at the wrong distance.
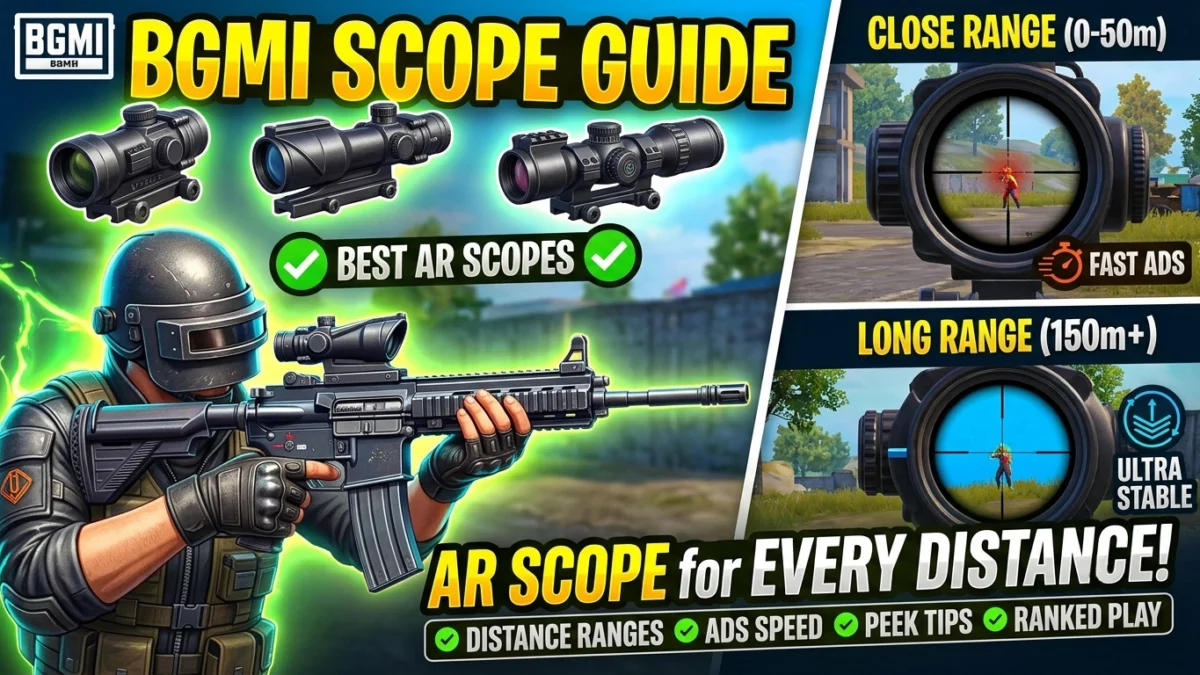
Most BGMI players collect every scope they find and slap the highest magnification on their gun. This is one of the most common mistakes in the game. Each scope in BGMI is built for a specific distance range, and using it outside that range puts you at a disadvantage every single time.
This guide covers every scope in BGMI, the exact distance each one is meant for, how ADS speed changes across scopes, when to use hip-fire instead of scoping in, and the peek shooting techniques that separate average players from good ones.
What Scopes Actually Do in BGMI
A scope does two things. First, it magnifies your view so you can see enemies at distance. Second, it changes your field of view, which means higher magnification scopes show you a smaller area of the map. This smaller view makes it harder to track moving enemies at close range.
Every scope also changes your ADS speed. ADS stands for Aim Down Sight, which is the time it takes from when you tap the scope button to when you are fully looking through the scope and can shoot accurately. Higher magnification scopes take longer to ADS. This delay can get you killed in close-range fights.
Understanding this tradeoff between magnification and ADS speed is the foundation of good scope usage in BGMI.
Every Scope in BGMI and When to Use It
Here is every scope available in BGMI, the distance range it works best at, and which weapons it pairs with.
Iron Sights (No Scope)
Distance range: 0 to 20 meters.
Iron sights are what you see when you have no scope attached. They are fast to ADS but offer zero magnification. Some weapons have cleaner iron sights than others. The UMP45 and Vector have very usable iron sights. The AKM iron sight is bulky and blocks part of your view.
When to use iron sights: Only when you have no scope at all, or in the first 30 seconds after landing when you grab a gun before finding any attachment. Replace iron sights with a Red Dot or Holographic as soon as you find one.
Red Dot Sight
Distance range: 0 to 50 meters.
The Red Dot is the most important scope in BGMI. It gives you a clean, small dot in the center of your screen with minimal visual obstruction. It has the fastest ADS speed of any scope in the game. In close-range fights inside buildings, around compounds, and in final circles, the Red Dot is your best friend.
Best weapons for Red Dot: Every AR, every SMG, shotguns with scope compatibility. The M416 with Red Dot is the standard close-range loadout for competitive play.
Why pros always carry a Red Dot: Even players who run a 3x or 6x on their primary AR keep a Red Dot in their backpack. When the zone shrinks to the final circles where all fights happen within 30 meters, they switch to Red Dot because the faster ADS gives them a reaction time advantage.
If you are a beginner and find yourself losing close-range fights, check your scope. If you are fighting at 20 meters with a 3x or 4x, the slower ADS and tighter field of view are hurting you. Switch to Red Dot for anything inside 50 meters.
Holographic Sight
Distance range: 0 to 75 meters.
The Holographic is similar to the Red Dot but with a slightly larger reticle housing. It covers more of your screen compared to the Red Dot, which is why most competitive players prefer the Red Dot. However, the Holographic has a marginally larger reticle circle that some players find easier to track moving targets with.
Best weapons for Holographic: SMGs in close to mid-range combat. The DP-28 with Holographic is a popular choice because the larger sight picture helps track targets during the DP-28’s slow fire rate.
Red Dot vs Holographic: There is no performance difference in ADS speed or accuracy. The choice is purely about which sight picture you are more comfortable with. If you have never tested both, go to Training Ground and try spraying an M416 with each one. Most players end up preferring Red Dot because it blocks less of the screen.
2x Scope
Distance range: 25 to 100 meters.
The 2x is the most underused scope in BGMI. Many players skip it entirely, going straight from Red Dot to 3x. This is a mistake. The 2x gives you enough magnification to identify and engage enemies at mid-range while keeping your ADS speed nearly as fast as a Red Dot.
Best weapons for 2x: ARs in open-field mid-range fights. The M416 and SCAR-L spray very well with a 2x. The 2x also works surprisingly well on SMGs like the UMP45 for extending their effective range.
When the 2x is better than 3x: In fast-paced situations where enemies keep pushing from different angles, the 2x gives you a wider field of view than the 3x. You can see more of the battlefield while still having enough zoom to land shots at 80 to 100 meters. In the transition from mid-game to late-game when the zone is medium-sized, the 2x is often the ideal scope.
3x Scope
Distance range: 50 to 200 meters.
The 3x is the single most important scope for ranked play in BGMI. It offers the perfect balance between magnification and spray control. You can identify enemies clearly at 150 meters, spray an M416 accurately at 100 meters, and still react fast enough for mid-range fights.
Best weapons for 3x: M416, SCAR-L, G36C, QBZ, Beryl M762 if you can control the recoil, and the DP-28. The combination of M416 plus 3x plus Compensator plus Vertical Grip is the most used competitive loadout in BGMI history.
Why the 3x is the meta scope: Professional BGMI players in tournaments like BMPS and BGIS almost universally run a 3x on their primary AR. The reason is simple. Most ranked fights in BGMI happen between 50 and 150 meters. The 3x covers this entire range perfectly. It is close enough in magnification that spraying is controllable, and far enough that you can spot and engage enemies before they close the distance.
The 6x trick: If you find a 6x scope but prefer spraying with a 3x, you can reduce the 6x magnification to 3x in-game by pinching the scope while ADS. This gives you the flexibility of both magnifications in one attachment. Many pro players do this instead of carrying a separate 3x.
If you are currently running a 4x on your AR because you think higher magnification is always better, try switching to a 3x for a week. Your spray control will improve significantly because the 3x has less visual zoom, which means your crosshair movement appears smoother and less jittery during sprays.
4x Scope (ACOG)
Distance range: 75 to 250 meters.
The 4x is a controversial scope. It offers good magnification for mid to long-range engagements, but it has a significantly slower ADS speed than the 3x and a tighter field of view that makes spraying more difficult. The 4x also covers a large portion of your screen when you scope in, which can feel claustrophobic on smaller phones.
Best weapons for 4x: DMRs like the SKS, SLR, Mini-14, and the DP-28. The 4x is not ideal for spraying ARs because the magnification amplifies your recoil visually, making it harder to control. However, for single-tap or burst fire on DMRs, the 4x is excellent.
When to use 4x on an AR: Only when you have no 3x available and need to engage targets beyond 100 meters. If you must spray with a 4x, use it on weapons with low recoil like the M416 or SCAR-L and fire in short 5 to 8 bullet bursts instead of full sprays.
4x vs 3x for ARs: The 3x is better for ARs in almost every situation. The only advantage the 4x has is more magnification, which helps with spotting enemies at 200 plus meters. But for actual gunfights where you need to spray, the 3x wins because it has faster ADS, wider field of view, and smoother spray control.
6x Scope
Distance range: 100 to 300 meters.
The 6x is one of the most versatile scopes in BGMI because it can be adjusted. You can toggle between 3x and 6x magnification by pinching while scoped in. This means one attachment covers everything from mid-range sprays at 3x to long-range picks at 6x.
Best weapons for 6x: DMRs like the SLR, SKS, and Mini-14. The M416 for long-range sprays when reduced to 3x. Bolt-action snipers as a substitute for 8x.
The 6x spray technique: Top players like Jonathan and Goblin are known for controlling M416 sprays at 6x magnification. This is extremely difficult and requires very low gyroscope sensitivity on the 6x, a Compensator, and a Vertical Grip. If you are not a high-skill player, do not attempt 6x sprays. Reduce the 6x to 3x for spraying and only use 6x magnification for single-tap shots.
When you find a 6x: Pick it up immediately. It replaces both your 3x and potentially your sniper scope. Put it on your primary AR, use it at 3x for spraying, and zoom to 6x when you need to take long-range DMR or sniper shots. This saves a backpack slot because you do not need a separate scope for your secondary weapon.
8x Scope
Distance range: 150 to 400 meters.
The 8x is a dedicated sniper scope. It provides the highest magnification in BGMI and can only be attached to DMRs and sniper rifles. You cannot put an 8x on an AR or SMG.
Best weapons for 8x: AWM, Kar98k, M24, and the Mosin Nagant. For DMRs, the Mini-14 and SLR with 8x can be effective for very long-range tap shooting.
The 8x can toggle: Similar to the 6x, the 8x can be toggled down to 4x magnification. This makes it more versatile than most players realize. When enemies are at 150 to 200 meters, reduce to 4x for better stability. When they are 300 plus meters away, use the full 8x.
When to use 8x: Only on bolt-action snipers or DMRs. The 8x is best used in the early and mid-game when the zone is large and enemies are spread across the map. In final circles, the 8x is nearly useless because all fights happen at close range. Drop it for a Red Dot or 3x when the zone gets small.
Canted Sight
Distance range: 0 to 30 meters.
The Canted Sight is a secondary scope that attaches alongside your primary scope. When you scope in with your primary 3x, 4x, 6x, or 8x, you can quickly switch to the Canted Sight for close-range fights without unscoping and switching attachments.
Best use: Put a 6x on your M416 as your primary scope and a Canted Sight as your secondary. You now have three magnification options on one gun. Canted for close-range, 3x by reducing the 6x, and 6x for long-range.
Where to find it: The Canted Sight spawns rarely on the ground. It is more commonly found in airdrops and as floor loot on Livik.
The Distance Rule You Should Memorize
This is the simplest way to remember which scope to use. Memorize these three rules and you will make the right choice in 90 percent of fights.
Inside a building or compound: Red Dot or Holographic. Never scope in with anything higher.
Open field between 50 and 150 meters: 3x scope. This is where most BGMI fights happen.
Targets beyond 200 meters: 6x or 8x. Single-tap or burst only. Do not spray.
If you only remember one thing from this guide, remember this: the 3x is your default scope for most of the match, and you should always carry a Red Dot in your backpack for switching when the zone gets small.
ADS Speed: Why It Decides Close-Range Fights
ADS speed is the time between pressing the scope button and your scope being fully open and ready to fire accurately. In close-range fights where both players see each other at the same time, the player who scopes in faster gets the first accurate shot.
Here is how ADS speed ranks across scopes, from fastest to slowest:
Iron Sights and Red Dot are the fastest. Nearly instant.
Holographic is almost identical to Red Dot.
2x Scope is slightly slower than Red Dot but still fast.
3x Scope has a noticeable delay compared to Red Dot. About 20 to 30 percent slower.
4x Scope is significantly slower. You can feel the delay in fast fights.
6x Scope is very slow to ADS. Not usable in reactive close-range fights.
8x Scope is the slowest. Only used when you have time to pre-aim.
What this means in practice: if an enemy appears 20 meters in front of you and you have a 6x on your M416, you should not scope in. By the time your ADS opens, the enemy has already started shooting. Instead, either hip-fire or quickly swap to your secondary weapon with a Red Dot.
Grips that affect ADS speed: The Angled Foregrip and Thumb Grip both reduce ADS time. If you play aggressively and take a lot of close-range fights, using an Angled Grip on your AR with a 3x scope helps offset the scope’s slower ADS compared to a Red Dot.
When to Hip-Fire Instead of Scoping In
Hip-fire means shooting without scoping in. Your crosshair is wider and less accurate, but you can move at full speed and there is zero ADS delay. In certain situations, hip-fire is actually better than scoping in.
Use hip-fire when the enemy is within 10 meters. At this range, the wide crosshair still covers the enemy’s body, and the speed advantage of no ADS is more important than precision.
Use hip-fire when you are caught off guard. If an enemy suddenly appears next to you while you are running, hip-fire while moving gives you a better chance than standing still to ADS.
Use hip-fire with shotguns. Shotguns like the S1897, S686, and S12K are designed for hip-fire. Their spread pattern at close range makes scoping unnecessary.
Use hip-fire with SMGs in buildings. The Vector, UMP45, and MP5K have excellent hip-fire accuracy. In tight corridors and rooms, hip-fire while strafing side to side makes you a harder target to hit.
Do not hip-fire beyond 15 meters. The bullet spread becomes too wide and you will miss most of your shots. Beyond 15 meters, always scope in.
Peek Shooting: The Technique That Wins Ranked Fights
Peek shooting means exposing only a small part of your body from behind cover, taking a shot, and immediately going back into cover. Mastering this technique is what separates Diamond and Crown players from Ace and Conqueror players.
There are three types of peek shooting in BGMI.
Jiggle Peek
Jiggle peeking is rapidly moving left and right from behind cover to gather information about enemy positions without exposing yourself long enough to get shot. You are not trying to shoot during a jiggle peek. You are trying to spot the enemy.
How to do it: Stand behind a tree, wall, or rock. Quickly tap your movement joystick to the right to peek out, then immediately tap left to go back behind cover. Do this two or three times. Each peek should last less than half a second.
When to use it: When you know an enemy is nearby but you do not know their exact position. Jiggle peeking forces the enemy to shoot and miss, revealing their location from the muzzle flash and gunshot sound. Now you know where they are, and you can set up a proper peek to engage them.
Lean Peek (Shoulder Peek)
Lean peeking uses the lean or peek buttons on your screen. When you lean right, your character tilts to the right and exposes only your shoulder and head from behind cover while keeping most of your body hidden.
How to do it: Position yourself behind hard cover like a tree or wall. Enable Peek in your controls if you have not already. Tap the right lean button to expose your right side. Scope in and fire two to four shots. Release the lean button to snap back behind cover.
When to use it: In compound fights where you are behind a wall or door frame. Lean peeking reduces the target your enemy can hit by roughly 60 percent. If they shoot at you, they are hitting your shoulder and arm. If you shoot at them, you are aiming at their full body.
Scope choice for lean peek: Red Dot or 3x depending on distance. Do not lean peek with a 6x because the slow ADS means you are exposed for too long before you can fire.
Quick Scope Peek
Quick scope peeking is the most aggressive peek technique. You step out from cover, scope in, fire a burst, and immediately step back. The entire action takes about one second.
How to do it: Stand behind cover. Step out by moving your joystick to the side. Immediately tap your scope button. Fire 3 to 5 bullets the moment your ADS opens. Move your joystick back behind cover. This should be one fluid motion.
When to use it: When you have already spotted the enemy and you know exactly where they are. Quick scope peeking is how you deal damage without taking a full fight in the open. You peek, fire, hide, peek, fire, hide. Each peek chips away at the enemy’s health.
Pro technique: Pre-aim your crosshair at the spot where the enemy’s body will be before you peek. This means when you step out and scope in, your crosshair is already on the enemy and you can fire immediately without wasting time dragging your aim.
The biggest peek mistake: Staying exposed too long. New players peek out and then spend one to two seconds trying to find the enemy with their scope. During that time, the enemy shoots them. The rule is simple: if you peek and do not see the enemy within half a second, go back behind cover. Do not stay out looking for them.
Scope Switching During a Match
Your scope choice should change as the match progresses. Here is a general pattern that works for most Erangel and Miramar matches.
Early game (first 5 minutes): Use whatever scope you find. Red Dot and Holographic are fine. Equip a 2x or 3x as soon as you find one.
Mid-game (circles 2 through 4): Your primary AR should have a 3x or a 6x reduced to 3x. Your secondary weapon like a DMR or sniper should have a 4x, 6x, or 8x. This is the phase where long-range picks matter. Carry a Red Dot in your backpack for later.
Late game (final 3 circles): Switch your primary AR scope to Red Dot. Final circle fights happen at 10 to 40 meters. The faster ADS of a Red Dot gives you an edge in every encounter. Keep the higher scope on your secondary weapon only if you have a DMR or sniper.
Many players forget to switch scopes as the match progresses. They enter the final circle with a 6x on their AR and die because they cannot ADS fast enough in a 15-meter fight. Do not make this mistake. The Red Dot swap in the final circles is one of the easiest improvements you can make to your gameplay.
Common Scope Mistakes
Using 4x on AR when 3x is available. The 3x is better for spraying in almost every situation. Use the 4x only on DMRs or when no 3x exists.
Never switching scopes during a match. Your scope should change based on the zone. 3x for mid-game, Red Dot for final circles.
Spraying with 6x or 8x. Unless you are a very high-skill player, do not attempt long-range sprays with 6x or 8x. Use single-tap or burst fire instead.
Not carrying a backup Red Dot. Always keep a Red Dot in your backpack. It weighs nothing and can save your life in the final circle.
Using 8x on DMRs at 100 meters. At 100 meters, an 8x makes the target appear so close that any small movement of your finger sends the crosshair flying off target. Reduce the 8x to 4x for DMR shots at this range.
Scoping in during close-range panic fights. If the enemy is within 10 meters and you are not already scoped in, hip-fire instead. The ADS delay will get you killed.
Frequently Asked Questions
What is the best scope in BGMI?
The 3x scope is the best all-round scope for ranked play. It covers the 50 to 200 meter range where most fights happen and allows clean AR sprays at mid-range. For close-range, the Red Dot is best. For long-range sniping, the 8x is best.
Can you put 8x on AR in BGMI?
No. The 8x scope can only be attached to DMRs and sniper rifles. You cannot put it on assault rifles or SMGs.
What is ADS in BGMI?
ADS stands for Aim Down Sight. It is the action of looking through your scope to aim precisely. ADS speed is how fast this action happens. Red Dot has the fastest ADS speed, and 8x has the slowest.
Should I use Hold or Tap for scope in BGMI?
For 2-thumb players, Tap is usually easier because you press once to scope in and once to scope out. For 3-finger and 4-finger claw players, Hold is better because it lets you scope in only while your finger is pressing the button, giving you faster control in peek situations.
Is 6x better than 3x in BGMI?
The 6x is more versatile because you can reduce it to 3x magnification. If you find both a 3x and a 6x, take the 6x because it gives you both options in one attachment. However, for pure spraying, a dedicated 3x provides a cleaner sight picture with less visual bulk.
What scope should I use in final circle?
Red Dot or Holographic. Final circle fights happen at 10 to 40 meters. Higher magnification scopes have slower ADS and tighter field of view, both of which hurt you in close-range fights. Switch to Red Dot when the zone gets small.
How do I reduce 6x to 3x in BGMI?
While scoped in with a 6x, pinch the screen with two fingers moving toward each other to reduce magnification to 3x. Spread your fingers apart to go back to 6x. On the 8x, pinching reduces it to 4x.
What is peek shooting in BGMI?
Peek shooting is a technique where you lean or step out from behind cover, fire a quick burst at the enemy, and immediately return to cover. It minimizes the time your body is exposed while still dealing damage. Most competitive players use lean peek combined with quick scoping.
Does ADS speed change with attachments?
Yes. The Angled Foregrip and Thumb Grip both reduce ADS time, meaning you scope in faster. The Tactical Stock on the M416 also slightly improves ADS stability. If you use a 3x or higher scope, pairing it with an Angled Grip helps you scope in faster during mid-range fights.
What is the best scope for M416 in BGMI?
The 3x scope is the best scope for the M416 in most situations. It gives you clean spray control at 50 to 150 meters where most AR fights happen. For close-range fights in final circles, swap to a Red Dot. If you find a 6x, you can reduce it to 3x and use one scope for both ranges.